Channel screen
The channel screen is the chat screen in your application, consisting primarily of a message list and an input area. Chat UI provides a default channel screen Activity class and a Fragment-based implementation.
- Activity-based: Chat UI SDK provides a default channel screen
ChannelActivity. The screen includes a title bar, message list, and input area. When you tap a channel in the channel list, the app navigates to the corresponding channel screen. Your application can useChannelActivitydirectly or create a custom channel Activity by inheritance. - Fragment-based: You can integrate the channel Fragment provided by Chat UI into your application Activity.
Chat interface
The chat interface typically consists of three parts: title bar, message list, and input area.
Chat UI includes a title bar implementation in the default channel screen Activity (ChannelActivity). If you build a channel screen based on Fragment, you need to implement the title bar yourself.
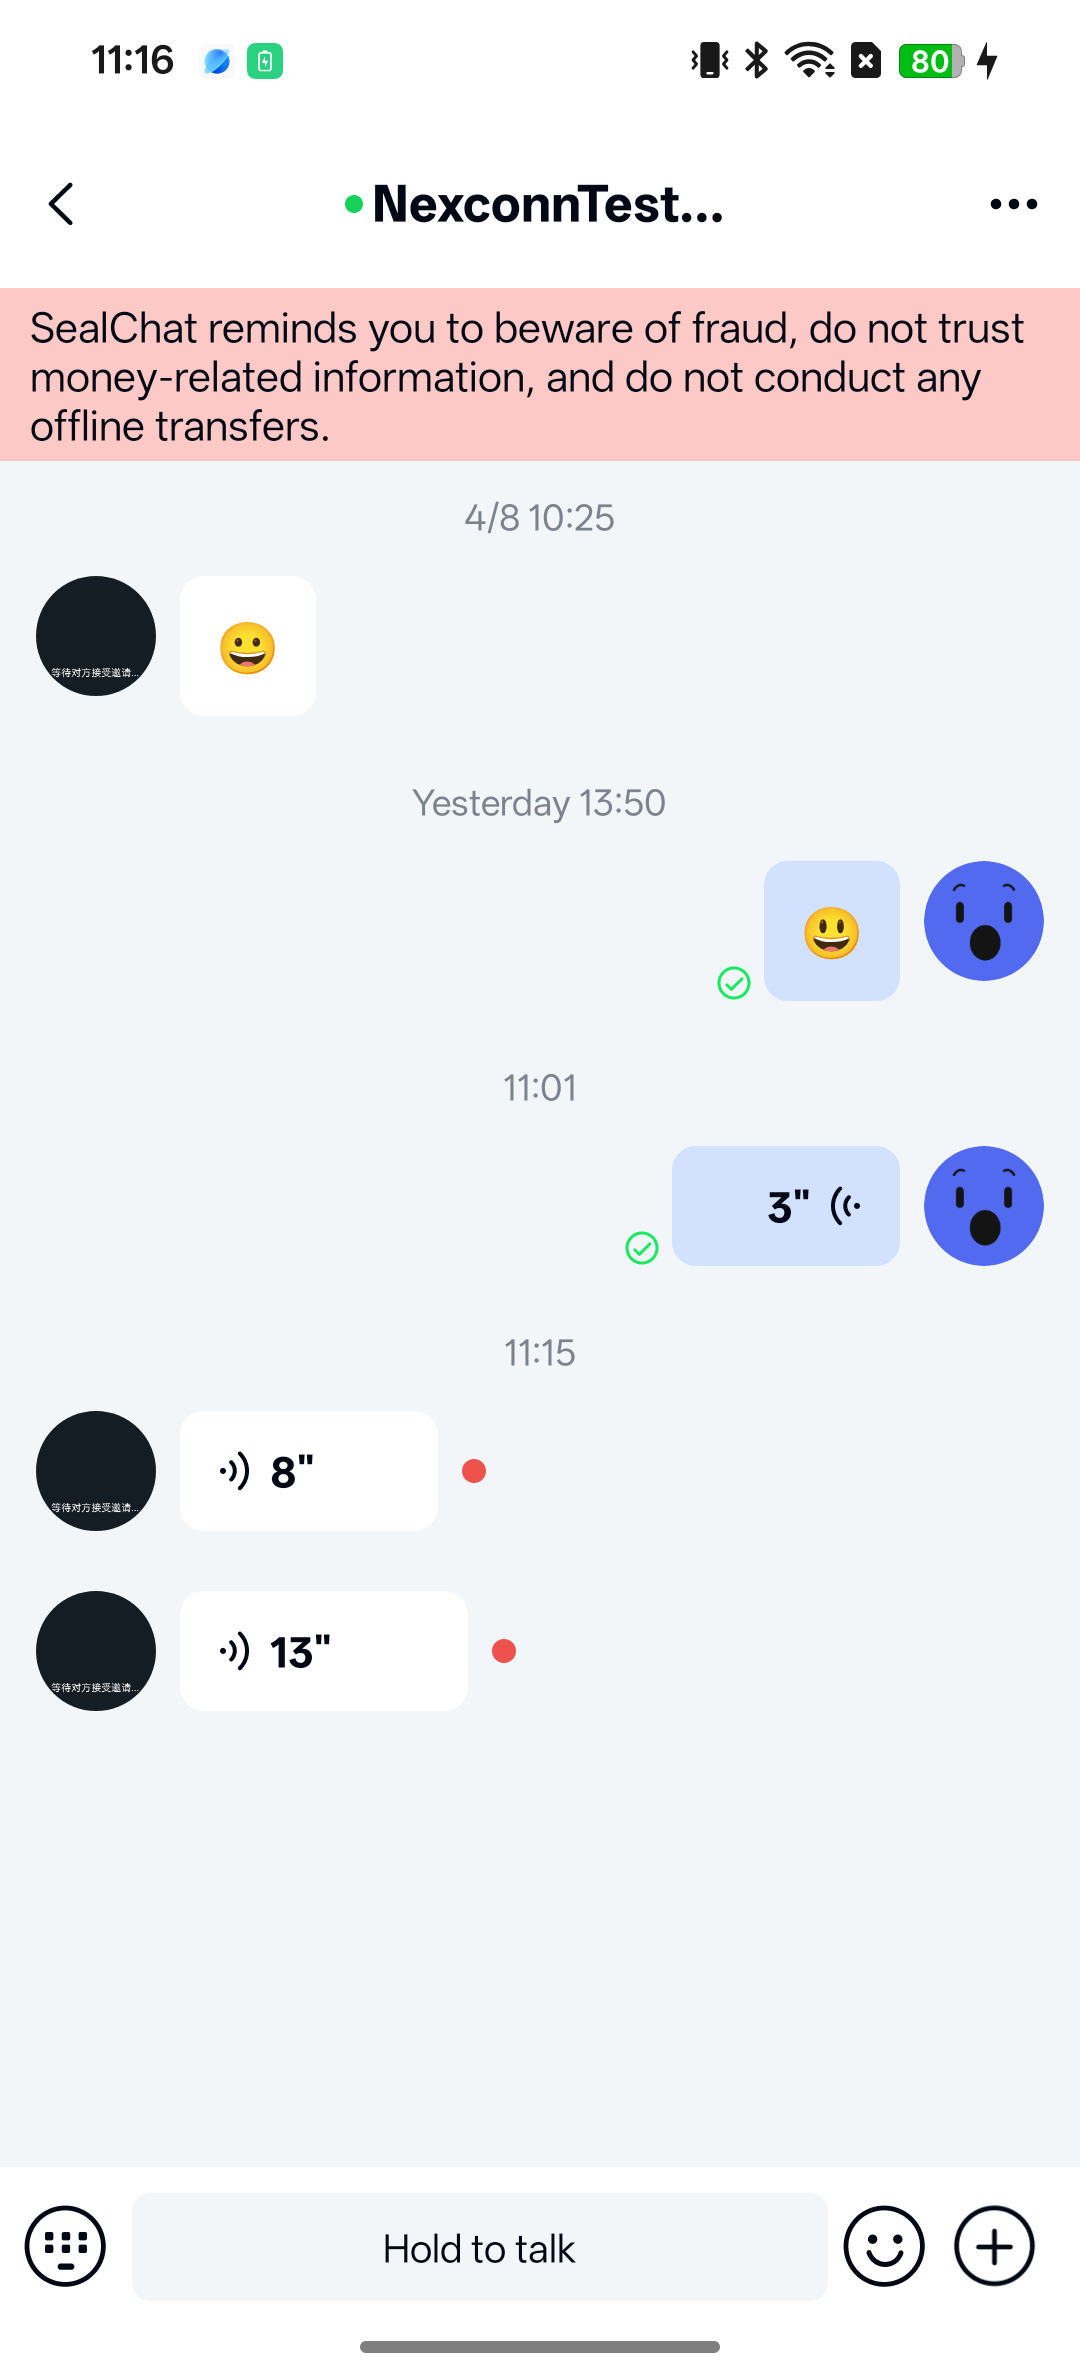
Title bar
Chat UI implements the channel screen title bar only in the default channel screen ChannelActivity. The title bar displays the channel title, which can be a group name or the other user's name in a direct chat. In direct channels, the title bar can display the other user's typing status. The title bar view is created and controlled in TitleBar.
The title bar provides two buttons, one on the left side of the component and another in the upper right corner. When the left button is tapped, the Activity's finish() method is called to exit the current screen. The right menu button is hidden by default. In a subclass created by inheriting ChannelActivity, you can show the right button using the setRightVisible method of mTitleBar, and set a listener using setOnRightIconClickListener to navigate to your custom screen or perform other custom actions when the user taps the right button.
If you build your own channel screen using ChannelFragment, no title bar is included by default. You can implement your own title bar by referring to Chat UI's title bar component, TitleBar.
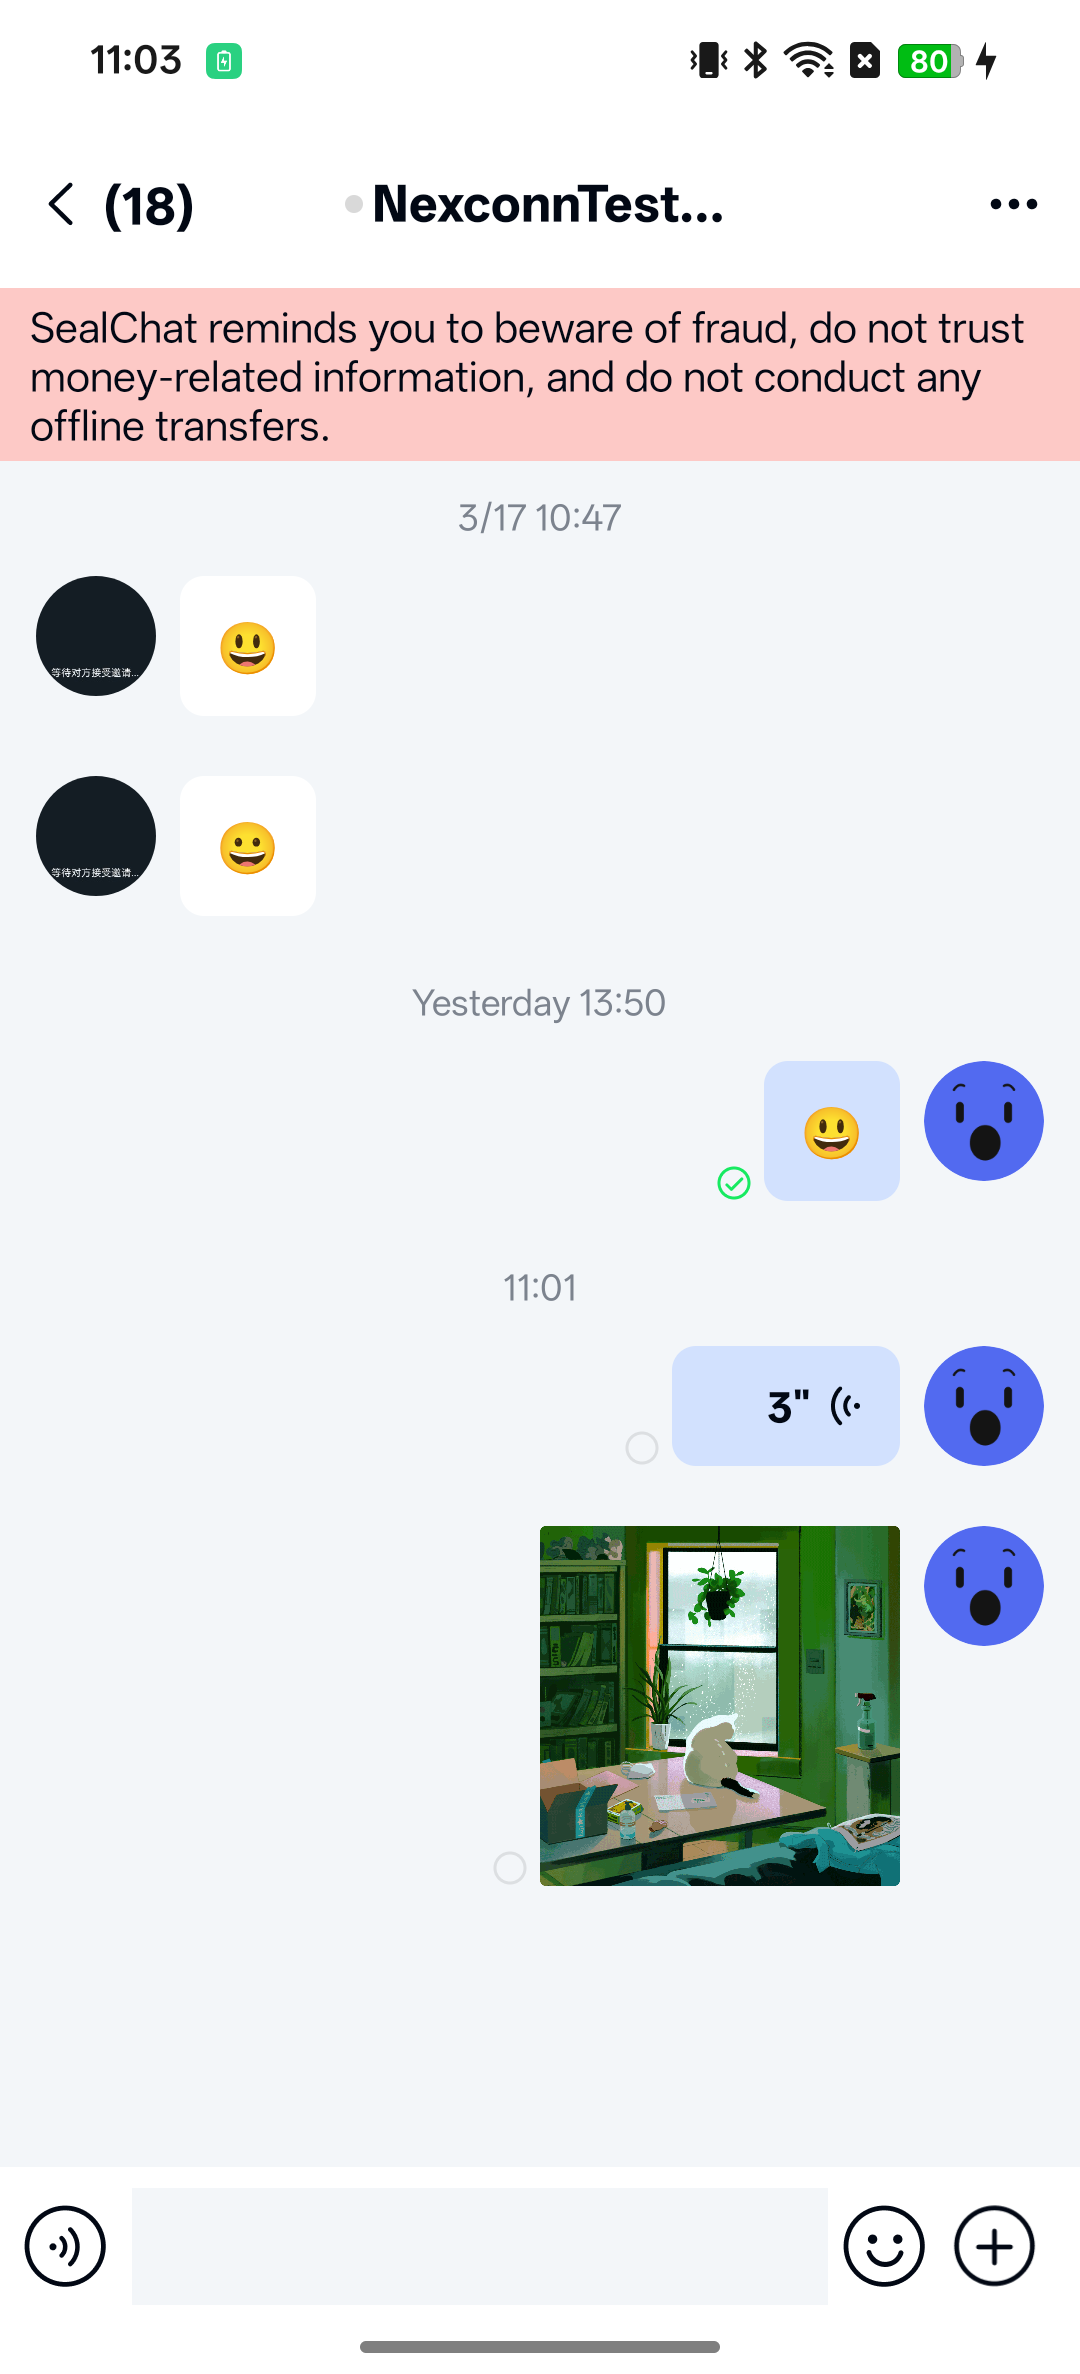
Message list
The message list component displays a chronological list of all messages. Messages sent by the current user are displayed separately from messages sent by other members. The message list view is created and customized in BaseMessageItemProvider and the display templates for each message type. You can also use MessageListAdapter to customize each item in the list view.
Input area
The message input component is where users can enter text, files, voice, images, videos, and other message types. The input area view is controlled centrally in NCExtension.
Usage
Chat UI provides Activity and Fragment classes to create channel screens. ChannelActivity is the default channel screen provided. When you tap a channel in the channel list, the app navigates to the corresponding channel screen. You can choose to use the default channel screen Activity directly, inherit from ChannelActivity, or use ChannelFragment to build a custom channel Activity.
Launch the channel screen
There are two ways to launch the channel screen Activity: by calling the SDK's built-in Activity router, or by using an intent. You can also customize the channel screen launch method to start the channel screen from other Activities in your application.
Chat UI implements the channel screen navigation logic by default. By default, when you tap a channel item in the channel list, the SDK automatically navigates to ChannelActivity, and the application layer does not need to handle this.
Using RouteUtils
RouteUtils is the Activity router built into Chat UI. It encapsulates the SDK's internal page navigation methods and avoids repetitive intent wrapping in your application.
If you build a custom channel Activity, you must register the custom Activity with RouteUtils before you can navigate to the custom channel Activity using this method. Otherwise, the navigation will go to the SDK's default ChannelActivity.
Navigate to the channel Activity:
- Kotlin
- Java
import ai.nexconn.chat.channel.ChannelType
import ai.nexconn.chat.channel.model.ChannelIdentifier
import ai.nexconn.chatui.utils.route.RouteUtils

val targetId = "userId"
val channelIdentifier = ChannelIdentifier(ChannelType.DIRECT, targetId)
RouteUtils.routeToChannelActivity(this, channelIdentifier)
import ai.nexconn.chat.channel.ChannelType;
import ai.nexconn.chat.channel.model.ChannelIdentifier;
import ai.nexconn.chatui.utils.route.RouteUtils;

String targetId = "userId";
ChannelIdentifier channelIdentifier = new ChannelIdentifier(ChannelType.DIRECT, targetId);
RouteUtils.routeToChannelActivity(this, channelIdentifier);
| Parameter | Type | Description |
|---|---|---|
| context | Context | Activity context |
| channelIdentifier | [ChannelIdentifier] | Channel identifier, including ChannelType and channelId |
Navigate using intent
Use the default ChannelActivity.newIntent(@NonNull Context context, @NonNull ChannelIdentifier identifier) helper when you want to open the SDK's built-in channel screen with the standard Android navigation mechanism. This helper writes the same RouteUtils.CHANNEL_TYPE and RouteUtils.TARGET_ID extras that ChannelFragment reads.
- Kotlin
- Java
import ai.nexconn.chat.channel.ChannelType
import ai.nexconn.chat.channel.model.ChannelIdentifier
import ai.nexconn.chatui.channel.ChannelActivity

val identifier = ChannelIdentifier(ChannelType.DIRECT, targetId)
startActivity(ChannelActivity.newIntent(this, identifier))
import ai.nexconn.chat.channel.ChannelType;
import ai.nexconn.chat.channel.model.ChannelIdentifier;
import ai.nexconn.chatui.channel.ChannelActivity;

ChannelIdentifier identifier = new ChannelIdentifier(ChannelType.DIRECT, targetId);
startActivity(ChannelActivity.newIntent(this, identifier));
Extend the default channel screen Activity
You can create a custom channel Activity by extending ChannelActivity to customize the channel screen. Note that you must register the custom channel Activity with RouteUtils. After registration, the custom channel Activity will replace Chat UI's default channel Activity. After the replacement is complete, when you tap a channel in the channel list, the SDK will navigate to your registered custom channel Activity. The registration method only needs to be called once during the application lifecycle in the main process.
- Kotlin
- Java
RouteUtils.registerActivity(
  RouteUtils.ChatUIActivityType.ChannelActivity,
  MyChannelActivity::class.java
)
RouteUtils.registerActivity(RouteUtils.ChatUIActivityType.ChannelActivity, MyChannelActivity.class);
Build a custom channel Activity using Fragment
To make it easier for your application to customize the channel screen, we recommend that you extend the channel Fragment class ChannelFragment to build a custom channel Activity. You need to register the custom channel Activity with Chat UI SDK to replace Chat UI's default channel Activity.
-
You can integrate the channel Fragment provided by Chat UI into your application Activity. The following example declares a new
MyChannelActivity.xml<activity
android:name="xxx.xxx.MyChannelActivity"
android:screenOrientation="portrait"
android:windowSoftInputMode="stateHidden|adjustResize">
</activity> -
Implement the Activity layout. This example uses
activity_channel.xml.xml<?xml version="1.0" encoding="utf-8"?>
<LinearLayout xmlns:android="http://schemas.android.com/apk/res/android"
android:orientation="vertical"
android:layout_width="match_parent"
android:layout_height="match_parent">
<FrameLayout
android:id="@+id/container"
android:layout_width="match_parent"
android:layout_height="match_parent" />
</LinearLayout> -
Create a subclass by extending Chat UI's
ChannelFragment, and use your custom channel Fragment subclass in theonCreate()method ofMyChannelActivity.- Kotlin
- Java
kotlinclass MyChannelActivity : FragmentActivity() {
override fun onCreate(savedInstanceState: Bundle?) {
super.onCreate(savedInstanceState)
setContentView(R.layout.activity_channel)
val channelFragment = AppChannelFragment()
supportFragmentManager
.beginTransaction()
.replace(R.id.container, channelFragment)
.commit()
}
}Javaclass MyChannelActivity extends FragmentActivity {
@Override
protected void onCreate(Bundle savedInstanceState) {
super.onCreate(savedInstanceState);
setContentView(R.layout.activity_channel);
// Add the channel interface using a subclass of ChannelFragment
ChannelFragment channelFragment = new AppChannelFragment();
FragmentManager manager = getSupportFragmentManager();
FragmentTransaction transaction = manager.beginTransaction();
transaction.replace(R.id.container, channelFragment);
transaction.commit();
}
} -
Register the custom channel Activity with
RouteUtilsto replace Chat UI's default channel Activity. After the replacement is complete, when you tap a channel in the channel list, the SDK will navigate to your registered custom channel Activity. The registration method only needs to be called once during the application lifecycle in the main process.- Kotlin
- Java
kotlinRouteUtils.registerActivity(
RouteUtils.ChatUIActivityType.ChannelActivity,
MyChannelActivity::class.java
)JavaRouteUtils.registerActivity(RouteUtils.ChatUIActivityType.ChannelActivity, MyChannelActivity.class);
Customization
You can customize the chat screen by modifying Chat UI global configuration and overriding methods in ChannelActivity or ChannelFragment.
Before you begin customization, we recommend first extending the SDK's built-in channel screen ChannelActivity or use ChannelFragment to create and implement your own channel screen Activity.
Some styles and behaviors in the channel screen are affected by Chat UI global configuration. To learn about global configuration, see [Configuration guide].
Modify user avatar shape and size
The user avatars displayed in the message list on the channel screen (the avatars shown on messages) can be modified through Chat UI global configuration.
The avatar shape defaults to rectangular and can be modified to display with rounded corners. The avatar display size defaults to 40dp*40dp. This method takes effect after the user sets an avatar. If no avatar is set, it cannot be modified to rounded corners using this method and defaults to a gray rectangular block. Call the following code after SDK initialization:
   NCChatUIConfig.featureConfig().setChatUIImageEngine(new GlideChatUIImageEngine() {
            @Override
            public void loadConversationPortrait(@NonNull Context context, @NonNull String url, @NonNull ImageView imageView, Message message) {
                Glide.with(context).load(url)
                        .apply(RequestOptions.bitmapTransform(new CircleCrop()))
                        .into(imageView);
            }
        });
Modifying Chat UI global configuration affects the display of all user avatars in Chat UI.
Hide user nicknames
Chat UI only supports hiding user nicknames in direct channel screens.
// Set whether to display user nicknames, only supported in direct channels
NCChatUIConfig.channelConfig().setShowReceiverUserTitle(true);
Hide default Emoji
The SDK supports disabling built-in Emoji. After disabling, the Emoji tab no longer appears in the emoticon panel.
Set default history message count
Chat UI retrieves history messages when entering the channel screen and when pulling down the page, with a default of 10 messages. It retrieves from local storage first. After local messages are retrieved, if the Cloud message storage feature is enabled, Chat UI can also retrieve history messages from the remote server. You can modify the default history message count.
Retrieving remote history messages requires the Cloud message storage feature to be enabled.
Set this before entering the channel screen.
// Default history message count
NCChatUIConfig.channelConfig().setConversationHistoryMessageCount(10);
// Default remote history message count
NCChatUIConfig.channelConfig().setConversationRemoteMessageCount(10);
You can enable the Cloud message storage feature in the console (original help center link is deprecated).
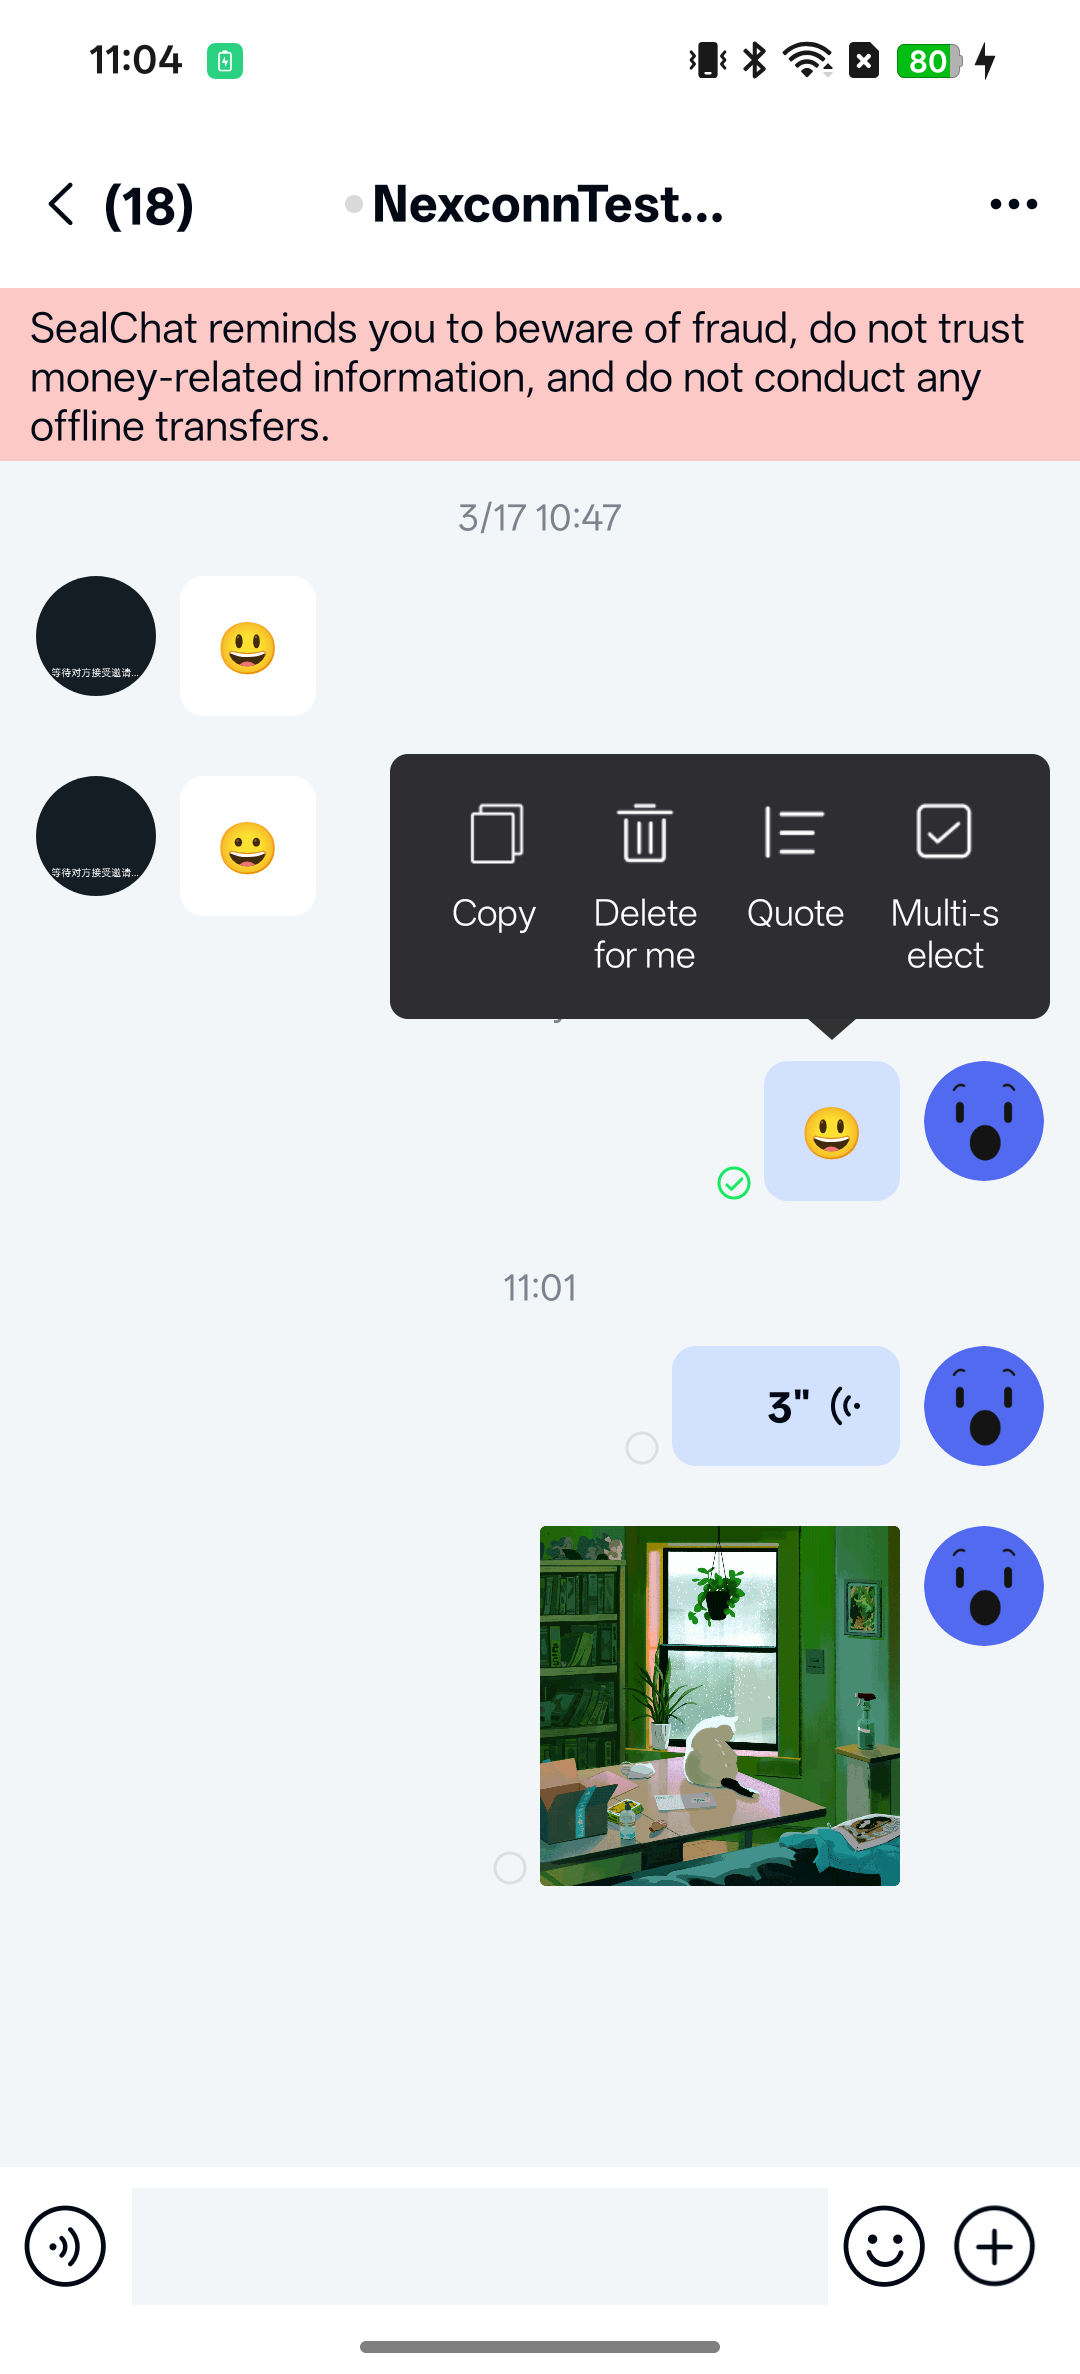
Modify delete behavior in long-press message menu
Chat UI's channel screen implements a delete message option in the menu that appears when you long-press a message by default.

The default implementation deletes the local message. If the App Key has the Cloud message storage service enabled, Chat UI will also delete the remote message.
To modify the default behavior of the delete message option in Chat UI's channel screen:
-
You can modify the
needDeleteRemoteMessageproperty through Chat UI global configuration.truemeans Chat UI should delete both local and remote messages.falsemeans only delete the message from the local message database.JavaNCChatUIConfig.channelConfig().setNeedDeleteRemoteMessage(true); -
To customize the delete behavior, use the current public API (such as
NCChatUI.deleteMessages/NCChatUI.deleteLocalMessages/NCChatUI.deleteMessageForAll) combined with custom long-press menu logic. See Customize long-press message menu options.
If the existing implementation does not meet your needs, you can directly use the API provided by the Chat UI core class NCChatUI. For specific core classes, APIs, and usage methods, see Delete messages.
Modify multi-select message count limit
Chat UI's channel screen implements multi-select message capability by default. When you long-press a single message in the message list on Chat UI's channel screen, the SDK displays a menu that includes a "More" option that leads to a submenu. Tapping it enters the message selection interface.
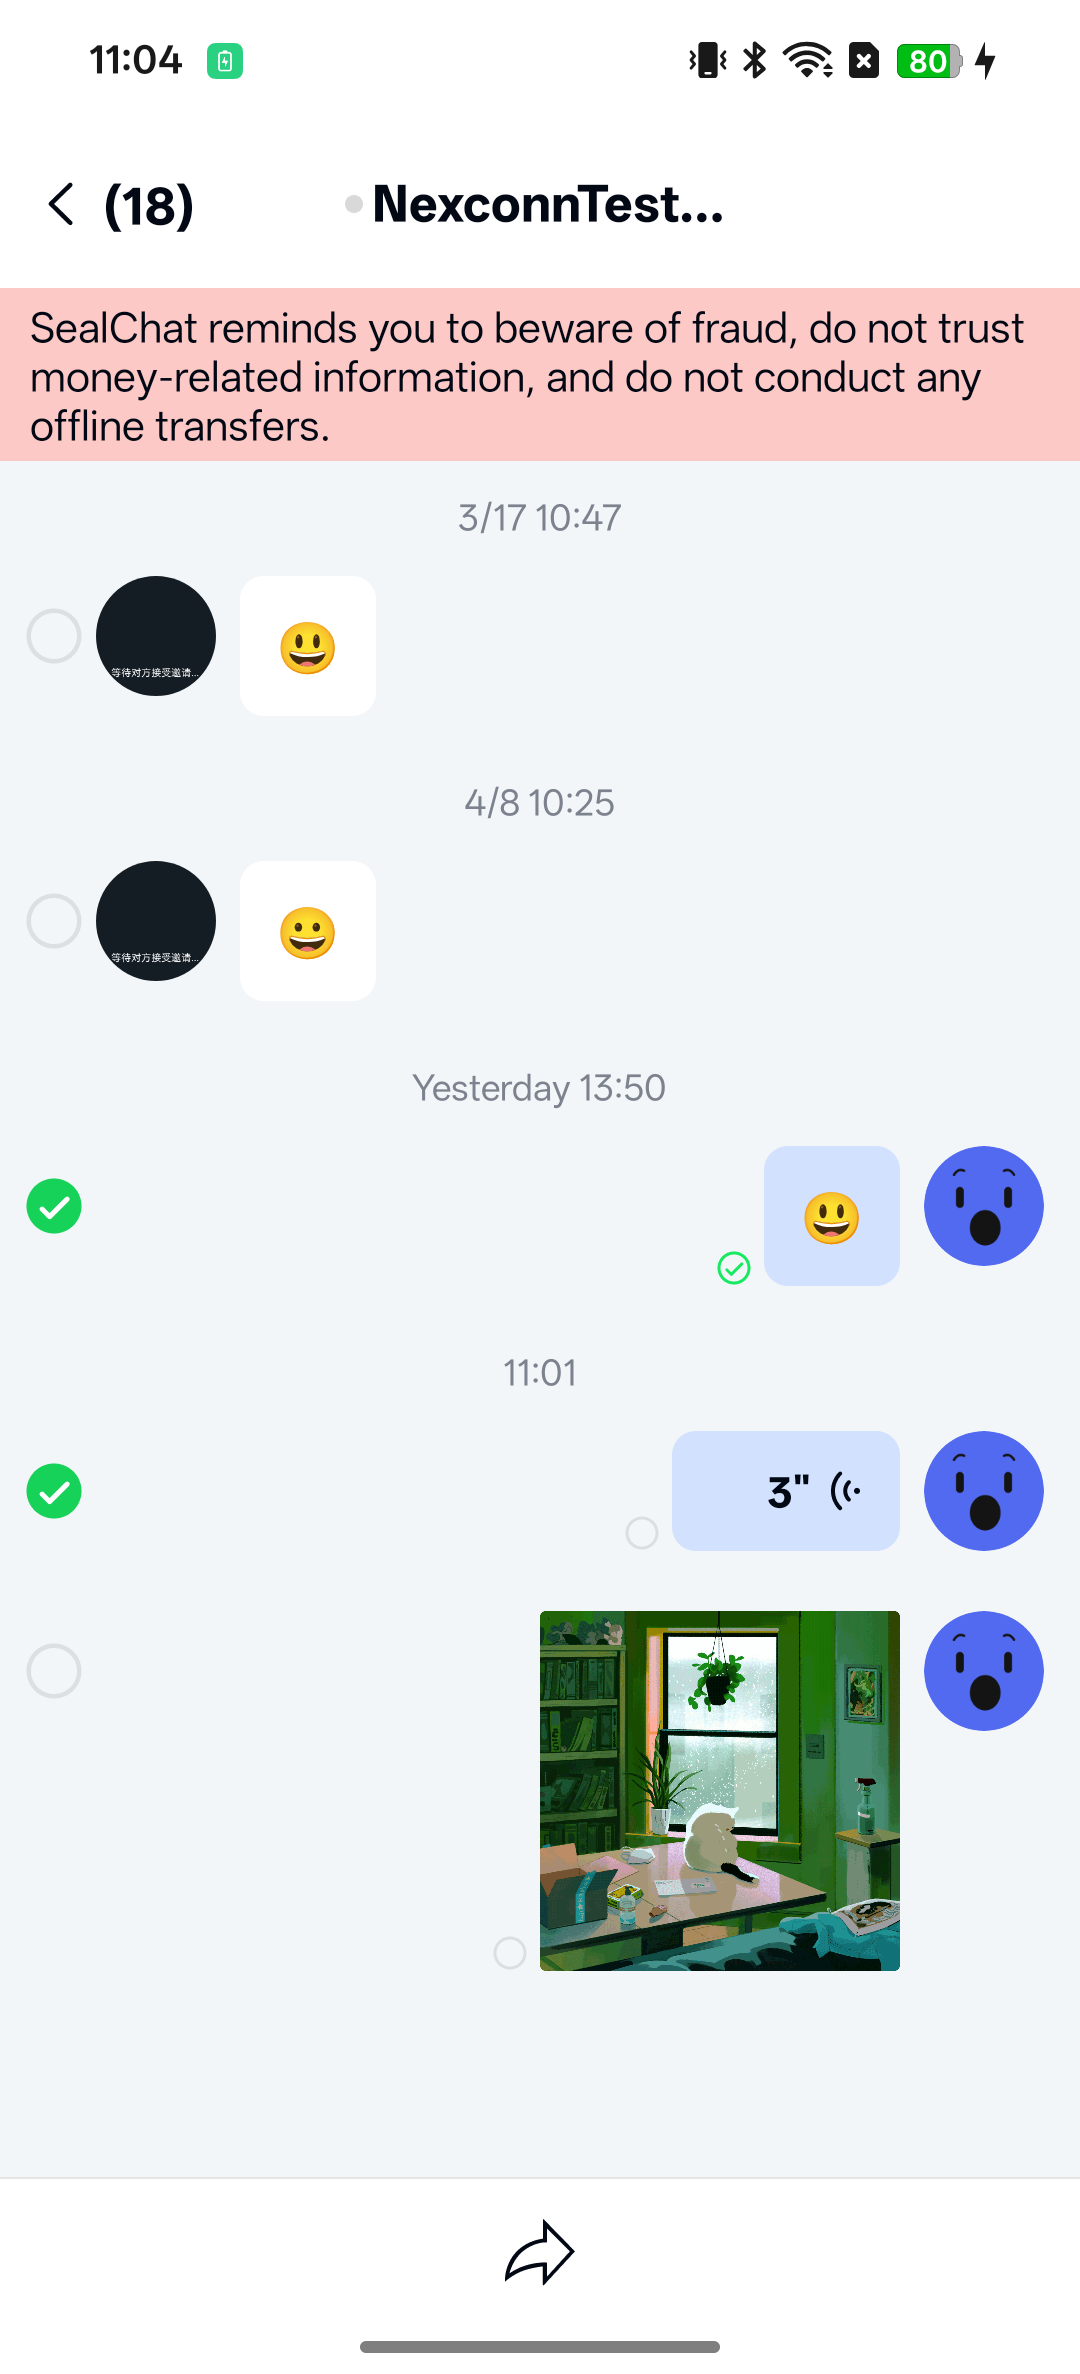
Chat UI defaults to selecting a maximum of 100 messages for subsequent operations. You can modify the multi-select message count limit through global configuration:
NCChatUIConfig.channelConfig().NC_max_message_selected_count = 100;
To modify Chat UI's default configuration, you can create an nc_config.xml file in your application's res/values directory and modify the value of the following configuration item.
<integer name="nc_max_message_selected_count">100</integer>
Hide the More button in long-press message popup
When you long-press a single message in the message list on Chat UI's channel screen, the SDK displays a menu that includes default implemented and displayed function options, such as "Delete message" and "Quote message", as well as a "More" option that leads to a submenu. Chat UI supports hiding the "More" option in the popup through global configuration.
Set this before entering the channel screen.
NCChatUIConfig.channelConfig().setShowMoreClickAction(false);
To customize the display name and order of menu options, or to add or remove menu options yourself, see Customize long-press message menu options.
Show network connection status notification
When the connection is lost or reconnecting, the SDK displays a connection status notification bar at the top of the channel list screen.
You can disable this notification on the channel screen through global configuration:
NCChatUIConfig.channelConfig().NC_is_show_warning_notification = false;
To modify Chat UI's default configuration, you can create an nc_config.xml file in your application's res/values directory and set the following variable to false to disable the notification bar. This XML configuration item will disable the connection status notification bar on both the channel screen and channel list screen.
<bool name="nc_is_show_warning_notification">false</bool>
Clear notification bar notifications
Chat UI supports clearing all notifications in the notification panel when opening the channel screen and channel list screen. The default value in the current source code is enabled.
You can set whether to clear all notifications when opening the channel screen through global configuration:
NCChatUIConfig.featureConfig().NC_wipe_out_notification_message = true;
To modify Chat UI's default configuration, you can create an nc_config.xml file in your application's res/values directory and set the following variable to true. This XML configuration item will affect the default behavior of both the channel screen and channel list screen.
<!--Whether to clear notification bar notifications when entering the channel or channel list interface-->
<bool name="nc_wipe_out_notification_message">true</bool>
Add custom header, footer, and empty layout
Chat UI's ChannelFragment supports adding custom header, footer, and empty views to the message list.
-
Create a subclass by extending Chat UI's
ChannelFragment. -
Implement the
addHeaderView(),addFooterView(), andsetEmptyView()methods in the subclass. -
Call your own
addHeaderView(),addFooterView(), andsetEmptyView()methods as needed in the subclass'sonViewCreated()method.Java@Override
public void onViewCreated(@NonNull View view, @Nullable Bundle savedInstanceState) {
super.onViewCreated(view, savedInstanceState);
addHeaderView(view);
addFooterView(view);
setEmptyView(view);
}
/**
* @param view Custom list header view
*/
public void addHeaderView(View view) {
mAdapter.addHeaderView(view);
}
/**
* @param view Custom list footer view
*/
public void addFooterView(View view) {
mAdapter.addFootView(view);
}
/**
* @param view Custom list empty data view
*/
public void setEmptyView(View view) {
mAdapter.setEmptyView(view);
}
/**
* @param emptyId Custom list empty data LayoutId
*/
public void setEmptyView(@LayoutRes int emptyId) {
mAdapter.setEmptyView(emptyId);
}
Other customization
You can continue to learn how to customize the channel screen in the following documents:
You can refer directly to ChannelActivity.java and ChannelFragment.java in the Chat UI source code to learn about more properties and methods.