Internationalization
The Chat UI SDK supports three languages by default: Simplified Chinese, English, and Arabic.
Using built-in languages
Follow system language
Chat UI automatically switches display language based on system settings without additional configuration.
When the system language isn't supported by Chat UI, English will be displayed as the fallback. Traditional Chinese (zh-Hant) falls back to Simplified Chinese (zh-Hans) unless you add a Traditional Chinese language pack.
Specify display language
Call this method before displaying any Chat UI interface, otherwise it may affect UI rendering.
// Set to Simplified Chinese @"zh-Hans"
NCChatUIConfigCenter.ui.preferredLanguage = NCChatUILanguageZH_HANS;

// Set to English @"en"
NCChatUIConfigCenter.ui.preferredLanguage = NCChatUILanguageEN;

// Set to Arabic @"ar"
NCChatUIConfigCenter.ui.preferredLanguage = NCChatUILanguageAR;

// Set to nil to follow system language
NCChatUIConfigCenter.ui.preferredLanguage = nil;
Adding language pack support
Chat UI looks for localization resource files named NCChatUI.strings in either the project mainBundle or NexconnChatUI.framework.
To add a new language pack, create a NCChatUI.strings file in your app project with the same name and translate the corresponding text.
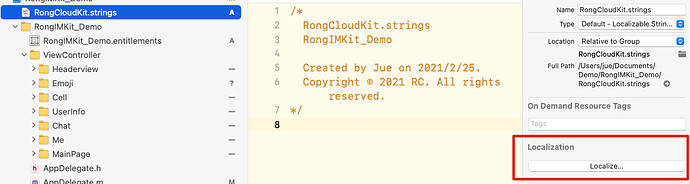
Add target language to project
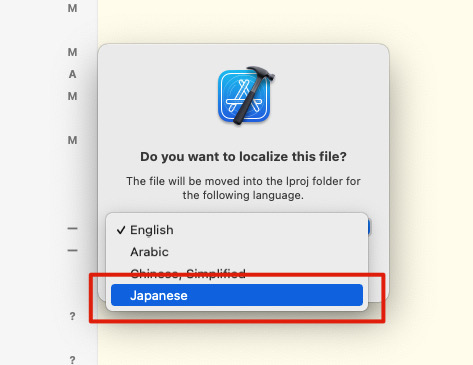
Step 1 Open Xcode project settings and add your target language (e.g., Japanese).
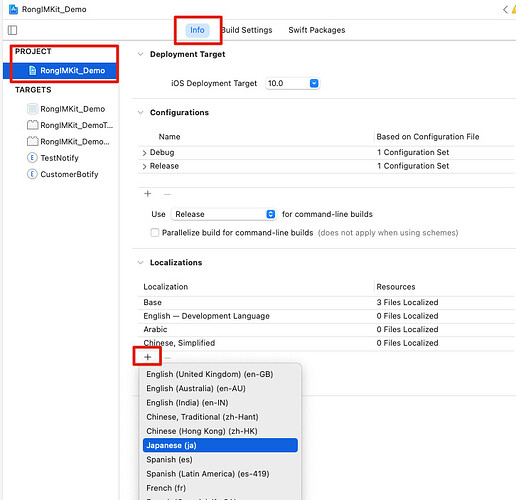
The menu items show language names followed by language IDs in parentheses (e.g., Japanese (ja) and Arabic (ar)). The .lproj directory name uses the language ID shown in parentheses.
When setting preferredLanguage, use the language ID from parentheses.
Example: NCChatUIConfigCenter.ui.preferredLanguage = @"ja";
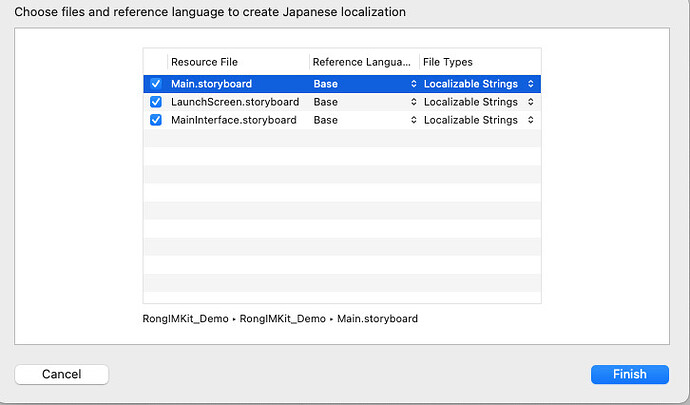
Step 2 Select at least one file and click Finish.
Add localized strings file
Step 1 Create a new Strings file in your app project.
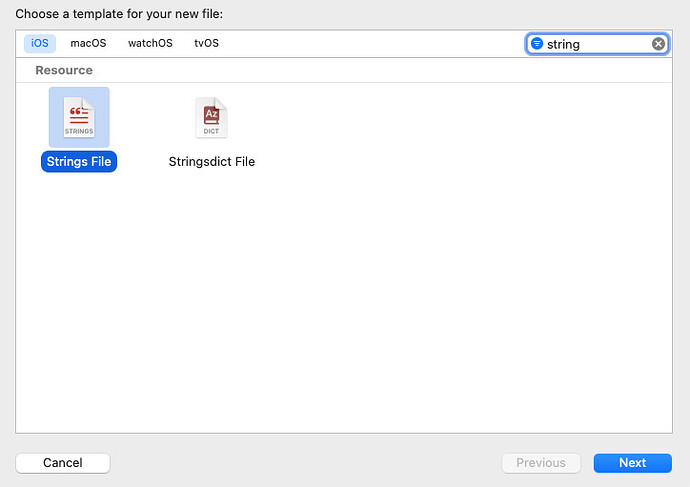
Step 2 Name the file exactly as NCChatUI.strings and click Create.
Step 3 Select the created NCChatUI.strings file and enable localization for your target language.
Step 4 Use Xcode file navigation or Command + Option + J shortcut to filter by NCChatUI.strings.
Step 5 Copy all keys from the SDK's NCChatUI.strings file to your project's NCChatUI.strings (Japanese).
Step 6 Keep keys unchanged and only translate the values after the equals sign.
Example:
"OK"="确定";
Translate the value to target language:
"OK"="確認";
To display Traditional Chinese, add a zh-Hant.lproj/NCChatUI.strings file to your app. The built-in SDK resources don't include Traditional Chinese.
Using new language packs
After adding language packs, use them in these ways:
Follow system language
Set preferredLanguage to nil to follow system language:
// Follow system language
NCChatUIConfigCenter.ui.preferredLanguage = nil;
Specify display language
Set the preferredLanguage property with the new language ID (e.g., Japanese (ja) or Arabic (ar)):
// Set specific display language
NCChatUIConfigCenter.ui.preferredLanguage = @"ja";
Troubleshooting
-
New language still shows Chinese/English
Check these items in your project:
- Verify
NCChatUI.stringshas Target Membership enabled and is included in app build - Confirm Localization is enabled for target language and you're editing the correct language subfile
- Ensure filename is exactly
NCChatUI.strings, not variants likeNCChatUI.strings.txt
- Verify
-
Partial translations missing
Usually means the key is missing in your language's
NCChatUI.strings. Cross-check with the SDK's built-inNCChatUI.stringsfile to add missing keys.