Send your first message
This guide shows the shortest working path through the Nexconn Chat UI SDK for Flutter: add the package, create the shared providers, initialize EngineProvider, connect with an application-issued user token, show ChannelPage, and open ChatPage.
Chat UI 26.2.6 is aligned with ai_nexconn_chat_plugin ^26.2.6. The published example app uses example/lib/main_github.dart as its entry point; internal development-only demo files are not part of the public integration path.
Prerequisites
- A Flutter project that meets the requirements in Import the SDK.
- A Nexconn application App Key.
- A user access token for a test user. Your app server obtains this token by calling the Nexconn Server API to register a user, then returns the token to your Flutter app.
- The App Key, token, and data center must belong to the same environment. For example, a Singapore App Key should initialize with
AreaCode.sg.
Get an App Key
- Sign in to the Nexconn Console.
- Create a new application or select an existing one.
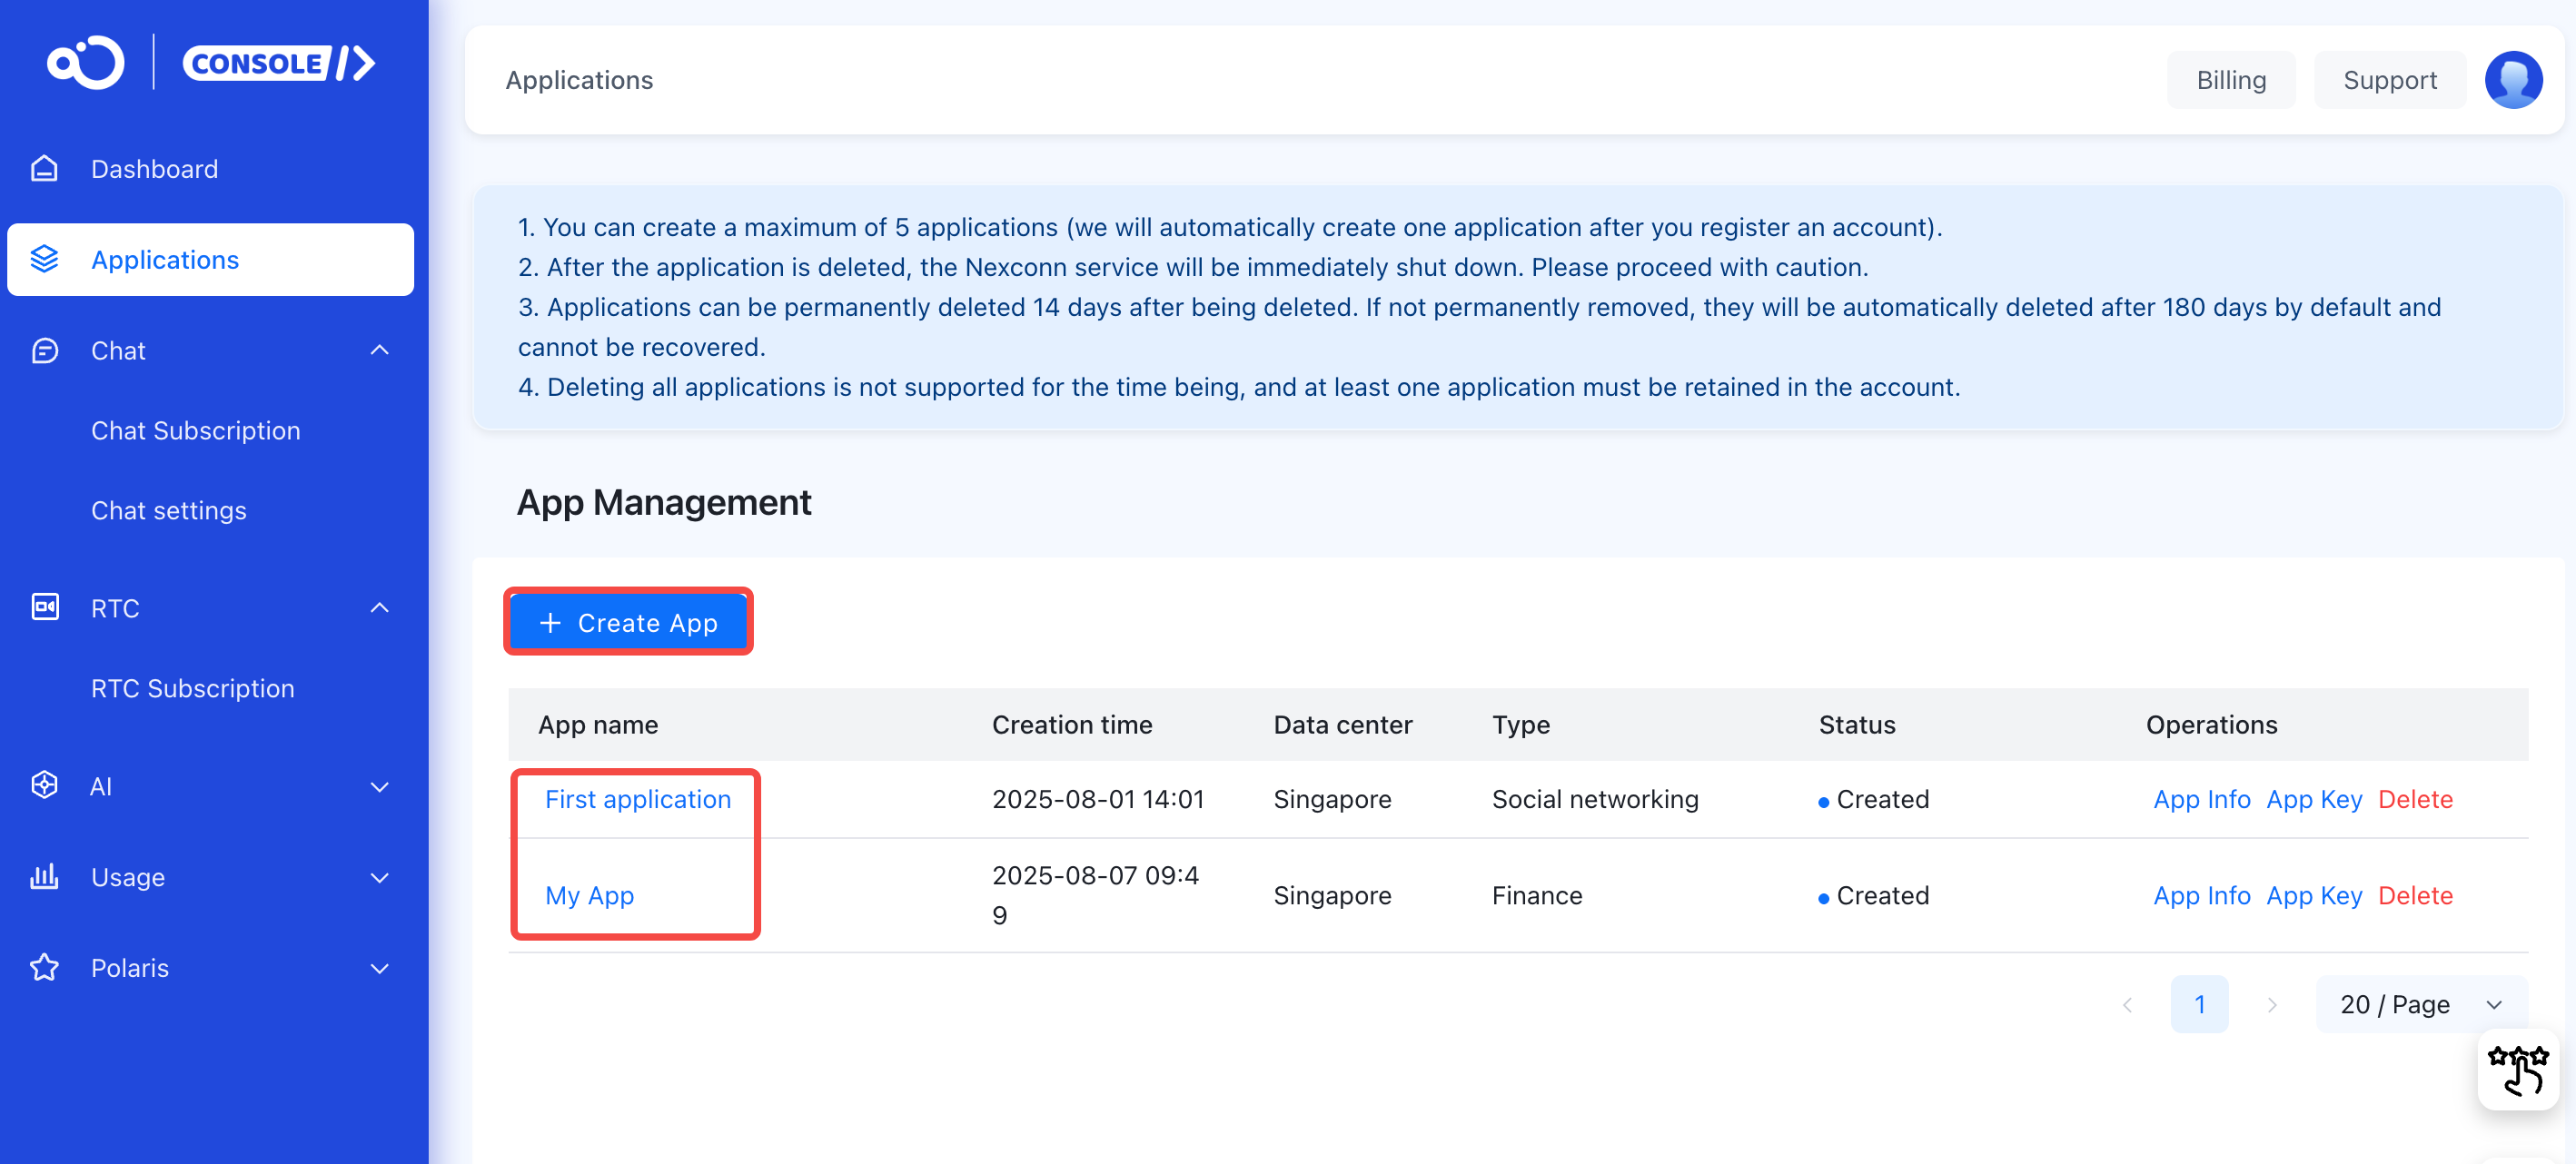
- Copy the App Key from the application settings page.
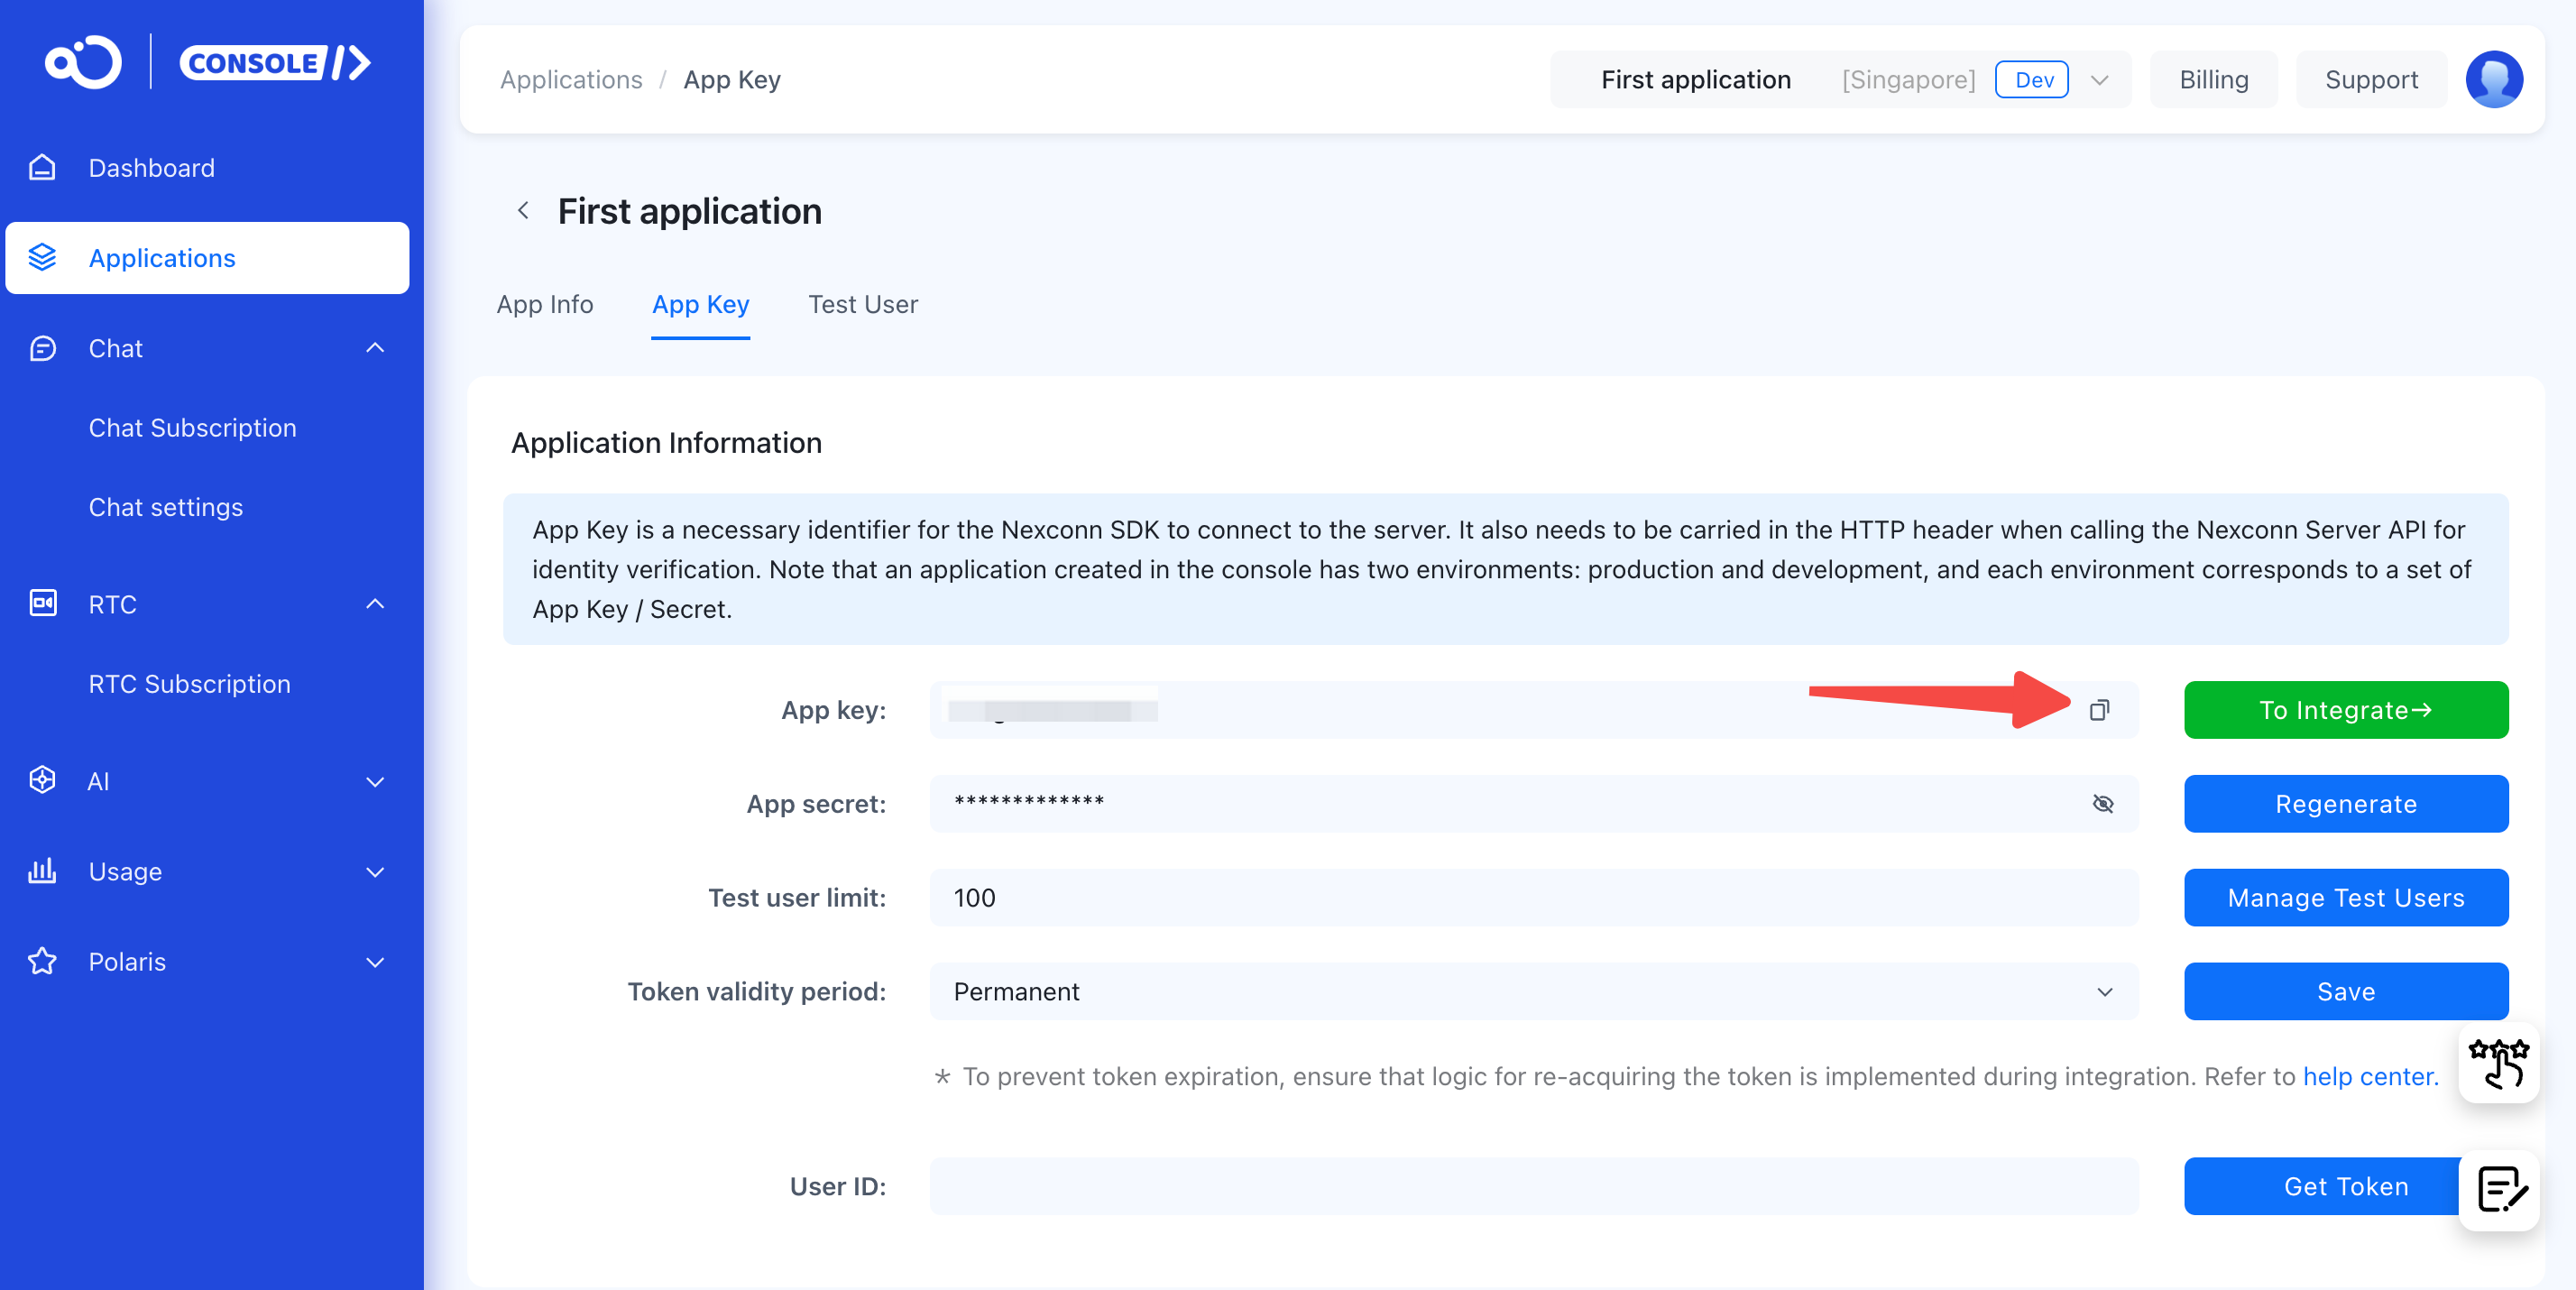
- Confirm the data center region shown in the console. If your app targets a non-default region, you must pass the matching
areaCodewhen initializing the SDK. An App Key from one region will not work with a different region's servers.
Prepare test users and tokens
Tokens are issued by your application server, not by the client SDK. For testing:
- Call the Nexconn Server API Register user endpoint with a
userIdand your App Key credentials. - The response includes an
accessToken. Pass this value toConnectParams(token: ...)in your Flutter app. - Tokens expire. Your app should refresh the token from your server before it expires and reconnect when needed.
Do not embed server credentials in your Flutter app. The token issuance flow must stay on your backend.
First-run workflow
When the workflow succeeds, the app logs the connected user ID, ChannelPage shows the user's channels, and messages sent from ChatPage appear as sent.
Step 1: Import the public entry point
import 'package:ai_nexconn_chatui_plugin/ai_nexconn_chatui_plugin.dart';
import 'package:flutter/material.dart';
import 'package:provider/provider.dart';
The ai_nexconn_chatui_plugin entry point exports the UI widgets, providers, configuration objects, and the Nexconn SDK types used by the UI API.
Step 2: Create the shared providers
Create one EngineProvider for the app session and wrap your app with NexconnChatUIProviders.
void main() {
  WidgetsFlutterBinding.ensureInitialized();

  final engineProvider = EngineProvider();
  final themeProvider = NexconnThemeProvider();

  runApp(
    NexconnChatUIProviders(
      engineProvider: engineProvider,
      themeProvider: themeProvider,
      child: MyApp(
        engineProvider: engineProvider,
        themeProvider: themeProvider,
      ),
    ),
  );
}
Step 3: Configure the Flutter app
Add the Chat UI localization delegates and use the theme provider when building MaterialApp.
The public example uses the pages under example/lib/views_github/: SetupPage, DemoChannelListPage, and DemoChatPage.
class MyApp extends StatelessWidget {
final EngineProvider engineProvider;
final NexconnThemeProvider themeProvider;
const MyApp({
super.key,
required this.engineProvider,
required this.themeProvider,
});
Widget build(BuildContext context) {
return MaterialApp(
locale: nexconnChatUIDefaultLocale,
localizationsDelegates: NexconnChatUILocalizations.localizationsDelegates,
supportedLocales: NexconnChatUILocalizations.supportedLocales,
theme: themeProvider.themeData(),
home: SetupPage(engineProvider: engineProvider),
routes: {
'/channel_list': (context) => DemoChannelListPage(
engineProvider: engineProvider,
),
'/chat': (context) => const DemoChatPage(),
},
);
}
}
Step 4: Initialize and connect
Initialize the engine with your App Key, then connect with a token from your application server. Before calling connect, have your app request a token from your own backend. Your backend should call the Register user Server API for the current userId and return the accessToken value to the app.
connect returns a numeric result code and also delivers the result through the callback. Check both to handle all failure paths.
Future<void> connectToNexconn(
  BuildContext context, {
  required String appKey,
  required String token,
}) async {
  final engineProvider = context.read<EngineProvider>();

  await engineProvider.initialize(
    InitParams(
      appKey: appKey,
      // Use AreaCode.sg when your App Key and token are issued
      // for the Singapore data center.
      areaCode: AreaCode.sg,
    ),
  );

  final code = await engineProvider.connect(
    ConnectParams(token: token),
    handler: (userId, error) {
      if (error == null && userId != null) {
        debugPrint('Connected as $userId');
      } else {
        debugPrint('Connection failed: ${error?.message ?? error?.reason ?? error?.code}');
      }
    },
  );

  if (code != 0) {
    debugPrint('Connect returned code $code');
  }
}
For non-default data centers, pass areaCode through InitParams. The App Key, token, and areaCode must all belong to the same environment.
// Singapore region example
await engineProvider.initialize(
  InitParams(
    appKey: appKey,
    areaCode: AreaCode.sg,
  ),
);
Step 5: Show the channel list
ChannelPage loads the current user's channels through ChannelProvider. Its default item tap behavior opens ChatPage.
class ChannelListScreen extends StatelessWidget {
const ChannelListScreen({super.key});
Widget build(BuildContext context) {
return const ChannelPage();
}
}
Use onItemTap when you need custom routing. The callback receives (channel, index, context).
ChannelPage(
  onItemTap: (channel, index, context) {
    Navigator.of(context).push(
      MaterialPageRoute<void>(
        builder: (_) => ChatPage(channel: channel),
      ),
    );
  },
);
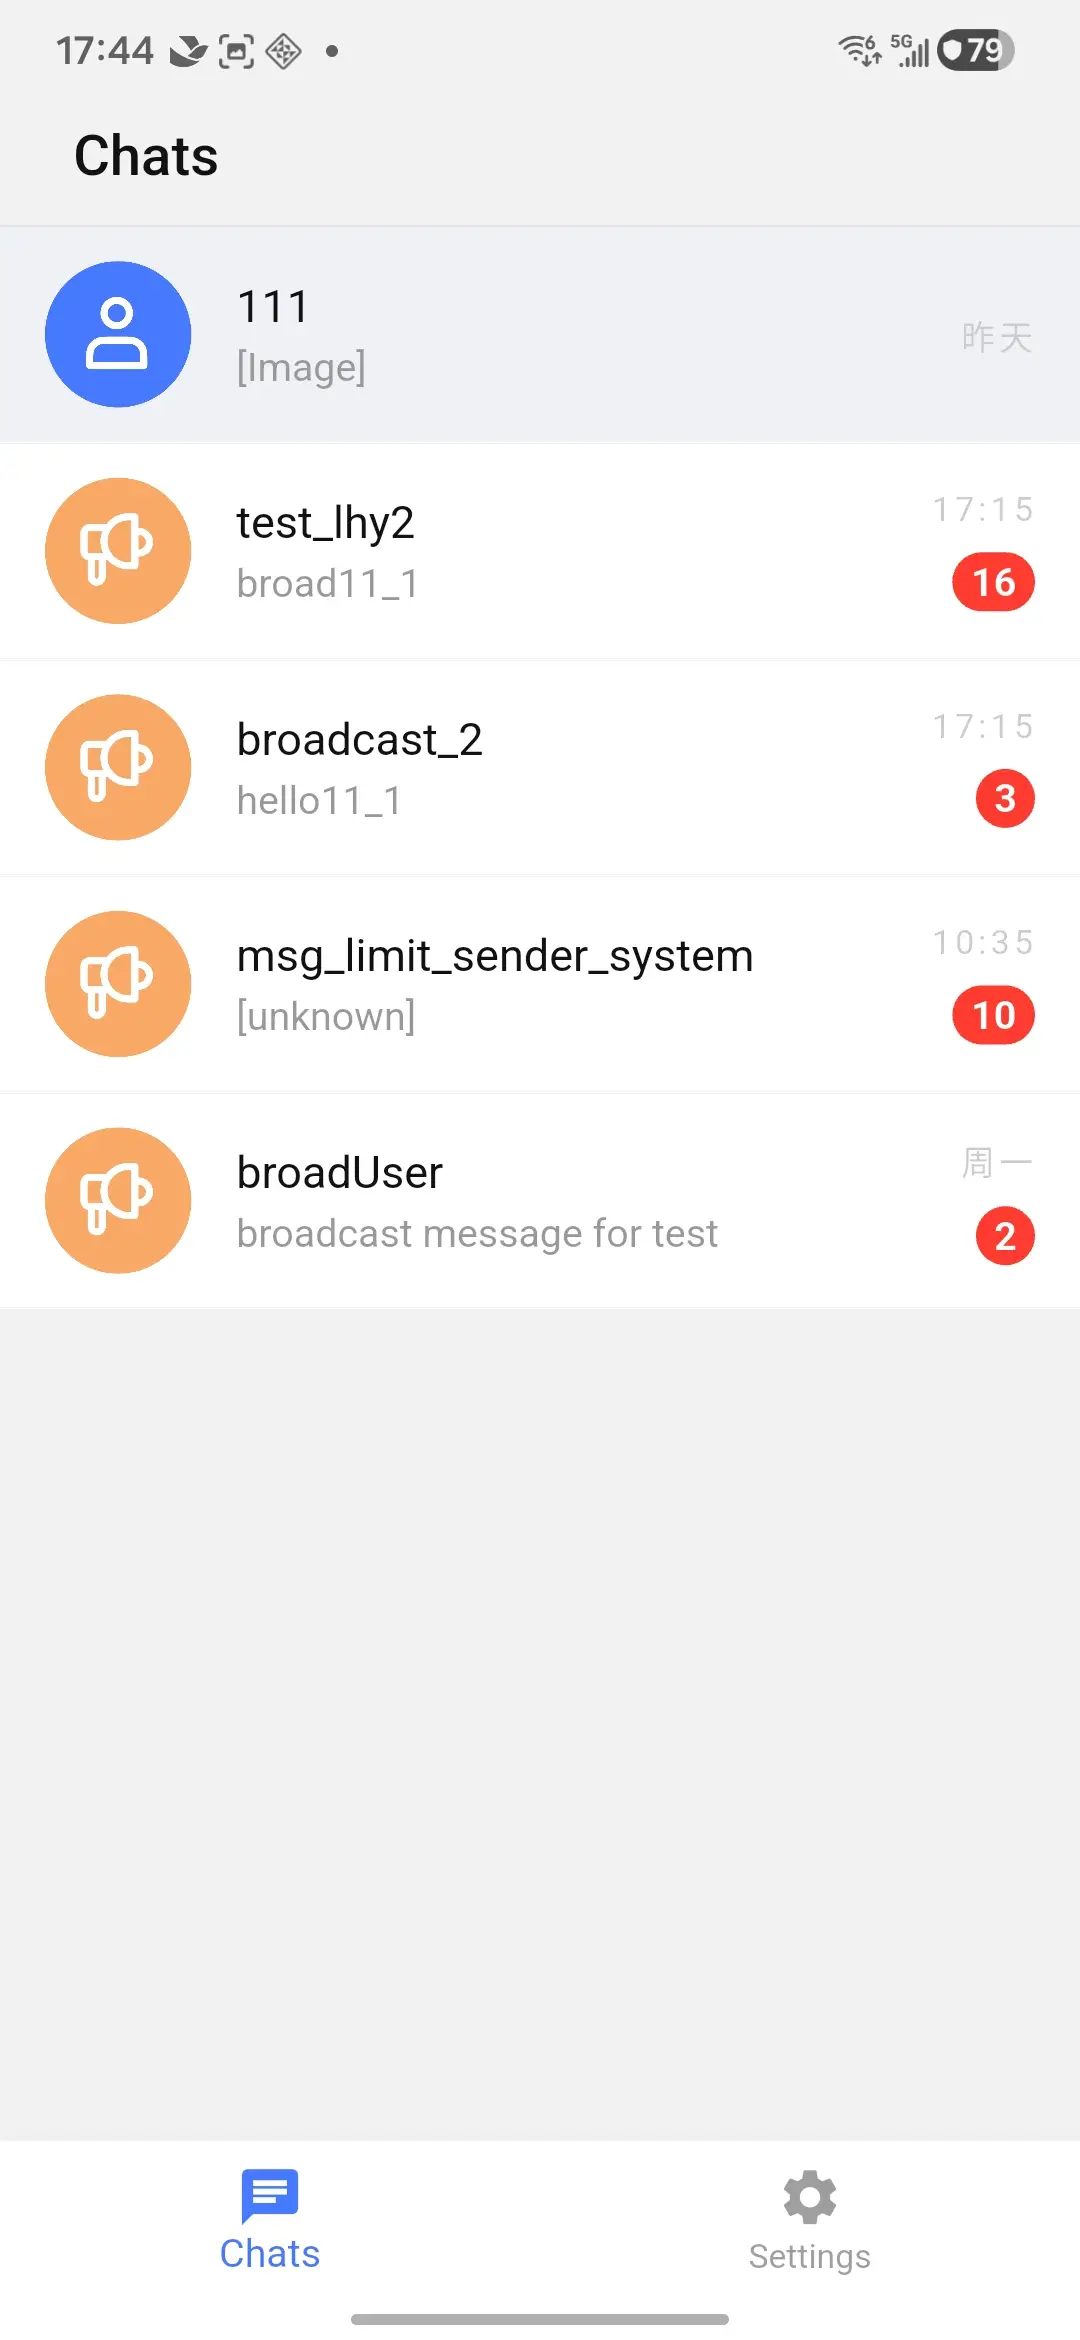
UI preview
The following image shows the default ChannelPage after connection.
Step 6: Send a message
ChatPage wires the default message input to ChatProvider. In a custom chat surface, read the provider from the page subtree and call sendText.
final chatProvider = context.read<ChatProvider>();
await chatProvider.sendText('Hello from Nexconn Chat UI');
The Chat UI layer also exposes helpers for common Nexconn message types, including image, GIF, voice, short video, file, location, reference, and combined messages.