Explore APIs with Postman
Postman is a widely used API testing tool. It supports advanced test scripts and automation features. This guide shows you how to quickly test the Nexconn Platform Chat API by using the preconfigured Collection and environment files.
Before you begin
- Install Postman. Postman v10 or later is recommended.
- Create an app in the Nexconn Developer Console.
- Get valid App-Key and App-Secret credentials for your app.
- Download the Postman Collection and environment package, then extract the following files:
postman_collection.json: the API request Collection filepostman_environment.json: the environment configuration file
We recommend using Postman v10 or later to ensure all features work as expected. Some scripting features may not be supported in older versions.
Step 1: Import the Collection
-
Open Postman.
-
In the upper-left corner, click Import.
-
Select the
postman_collection.jsonfile that you downloaded. -
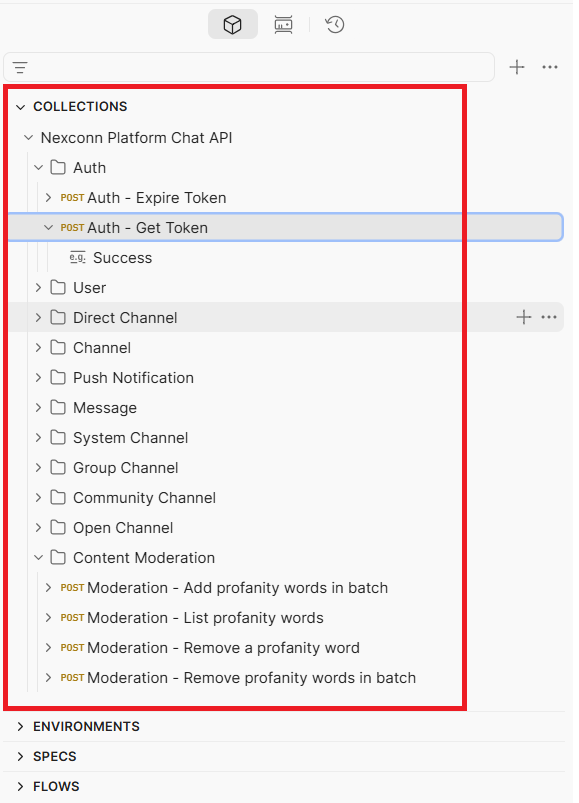
After the import is complete, you will see:
- A Nexconn Collection in the left navigation pane
- Multiple API categories inside the Collection, such as user management, group management, and message sending
- Individual API requests inside each category
Step 2: Configure environment variables
-
Import or create an environment.
- Import an environment file
- Create an environment manually
-
Open Postman.
-
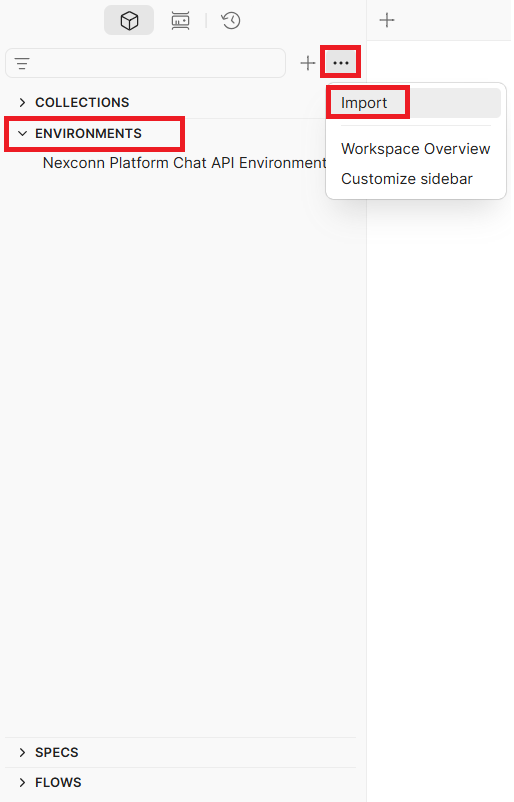
In the left navigation pane, click Environments > Import.
-
Select the
postman_environment.jsonfile that you downloaded. -
After the import is complete, a Nexconn environment appears in the left navigation pane.
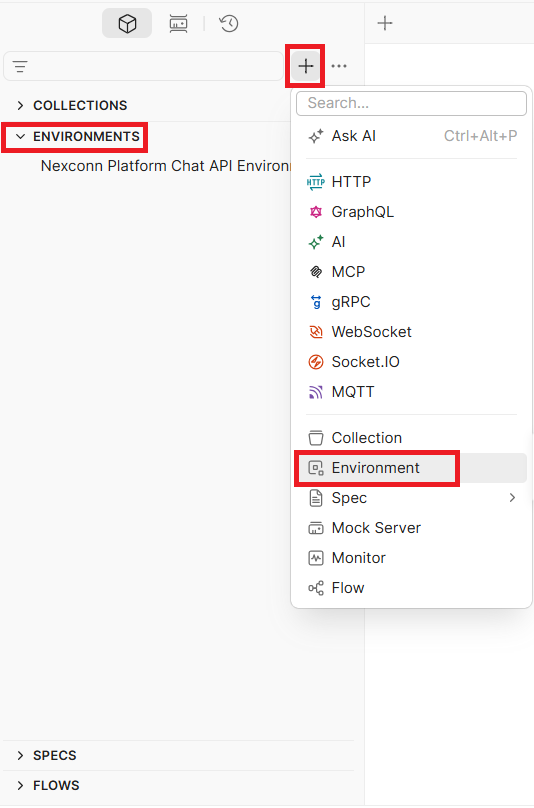
You can also create the environment manually.
-
Click Environments > Create Environment.
-
Set the environment name to
Nexconn.
-
Activate the environment.
In the upper-right corner, click the environment selector, which defaults to No Environment, and then select Nexconn from the drop-down list.
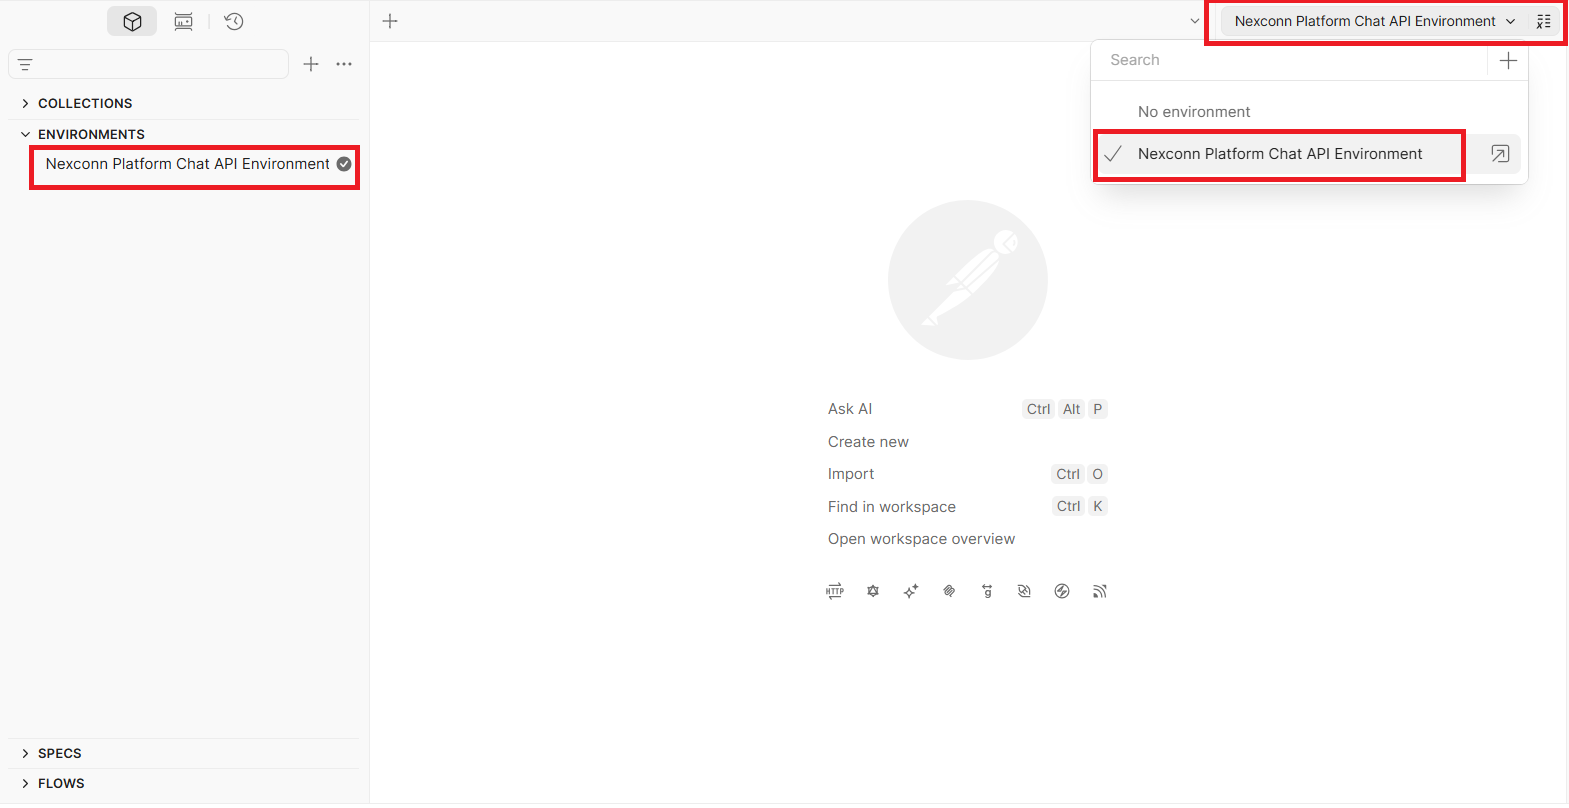 Confirm the active environment
After activation, Nexconn appears in the upper-right corner. This indicates that the environment is currently active.
-
Configure your credentials.
In the left navigation pane, select Environments and open the Nexconn environment. Then set the following variables:
Variable Value App-Key Your App Key from the Nexconn Console App-Secret Your App Secret from the Nexconn Console Host https://[data center domain]for your app. See Base URL.infoNonce,Timestamp, andSignatureare generated automatically. You do not need to edit them.- After updating variables, save the changes. Use
Ctrl+Son Windows orCommand+Son macOS. Otherwise, the changes will not be saved.
Step 3: Send a request
The following example uses the Get User Info API to demonstrate the full debugging workflow.
-
In the left navigation pane, open Collection > IM Server > User Management > POST Get User Info.
-
Configure the request parameters:
- In the Params tab, update the URL parameters if needed.
- In the Body tab, set the request body.
JSON{
"userId": "user_001"
} -
Click Send to send the request.
Postman includes built-in automatic signing for the Nexconn API. Each time you send a request, Postman automatically generates the signature and adds it to the request headers. For details about the signing logic, see API request signature.
-
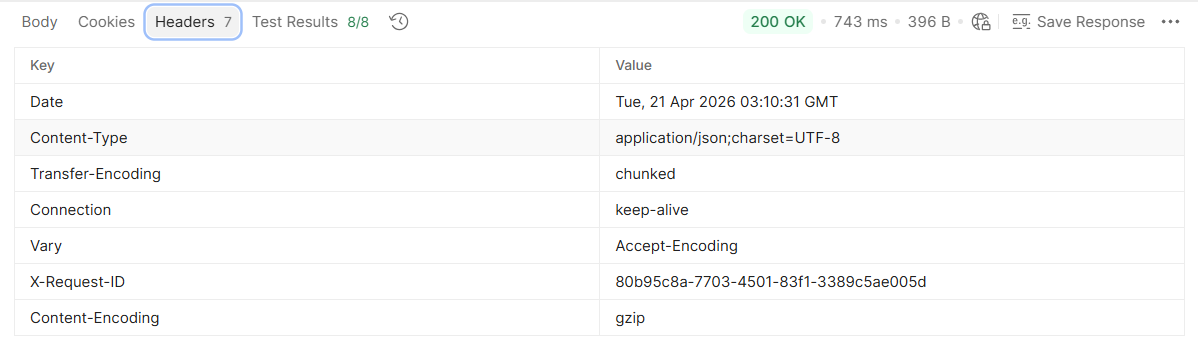
After the request succeeds, you will see a response similar to the following:
- HTTP status: The status bar at the top shows the HTTP status code.
200 OKmeans the request succeeded.4xxand5xxindicate an error. - Response body: The API returns the actual data in JSON format.
JSON{
"code": 0,
"data": {
"userId": "user_001",
"nickname": "Zhang San",
"portraitUri": "https://example.com/avatar.jpg"
}
} - HTTP status: The status bar at the top shows the HTTP status code.
-
You can also open the Console panel at the bottom to view debugging details such as:
- The original signature source string used for signature verification
- The actual headers sent with the request
- Request timing details for performance analysis